2012-05-14

Breaking ground (and the handles of all the tools.)

It has been a bit since my last update.  We have done a bit of work on the cabin two weekends ago Libby and I went up with a bunch of other campers to do some work on the cabin.  Here is last weekends summery with some photos thrown in.

I started the weekend with my minimum goal of accomplishment "unload the stuff at camp" anything more was gravy.  

We got up around 12:30 and everyone grabbed a drink and we walked into the woods to scout a spot.  We walked until we found something that looked like a clearing.  We laid out the bricks and started to try and build the frame from the high ground to the low ground.  We looked for whatever big rocks we could find and tried to put the posts on them.  We got one.   We went to grab the mattock to and the head broke off on the first hit.  We then worked our way out using the level and the frame to constrain construction.  I quickly realized "No Pilot required" was not the case for the 8 inch timber-locks I was using.  I was using my impact driver with the smallest lipo pack I had.   I gave up on the project for the first time of the weekend.  

I nice flat site.   Well, as flat as I could find.


I retired to the fire were Eric was sitting and he recommended the larger capacity battery pack.  I then went and tried again.  I got it to go in better, but not with the gumption I wanted.  I gave up for the second time of the weekend.  I went back to the fire and tried to find a 5/16th hex to 1/2 inch impact socket in Berlin at 5:15pm on a Saturday night.  Answer NO.  I was going to go read the directions on the box again, but we had already burned it.  We thought about using a 1/2 inch to 3/8th adapter to a 3/8th to 1/4 inch to a 5/16th socket might not be the best solution.  

Libby helping lay out the first beam.  We managed to miss all the big rocks and only set up anchor points above tree stumps.


Covert Drill charging under the table at breakfast.
I got more steam and went to go try my large drill in low speed setting.  WINNING!  we then started to build out the platform putting down a brick and putting up a 6x6 pillion then going and taking a break.  It grew bit by bit with everyone putting in a screw here and a beam there.  At the end of the night, we had 6 of the 10 pillars up and Nearing the end of the night Joe got Margarita Fury and put in all possible angular bracing.  Eric and I tried to hand him the correct parts to keep him moving before he ran out of tequila drive.  the front corner pillar ended up directly over a brand new tree we had just cut down.  We gave up and went to the camp fire.  I cleaned up for the night and collected the batteries and chargers for the morning.  breakfast/ errands/ best cup of coffee in Milan/ buy stuff at tractor supply I forgot.  
How things looked when we got to work on Sunday morning.


We went back to work on the floor and try and put up the last 4 piers.  We broke the pick ax handle with the first swing but Randal cut out a tree stump with his pocket knife and Rage.  
QC From our most valued construction help.  


The other 3 were not to bad. H kid was very helpful and put in all the 3/8ths lag bolts with the impact driver.  She also learned how to tie her hair back and secure loose clothing while running power tools (before any problems happened)  The forth still has chunks of stump after various attempts of removal by a few of us.  We left the assembly only missing one 6x6 post and half of the diagonal supports.  I figure give it some time to settle before we lock everything down.  We packed up and headed home at dark.  It was really an awesome weekend with everyone up at camp.
Burning out a broken ax handle.

Now I am getting ready for next weekends building.  The biggest hold ups are finding 5 inch decking screws.  I would rather purchase them locally, but it looks like amazon is my only option.  The second is for the rest of the equipment to come in for work.  (our floor)

Stacks of headers ready to be assembled up at camp
We had a limitation with the chop saw of 45 degree angles.  A few parts needed 52 degree angles we will need to chop them up at make it labs.


Parts that need a 52 degrees
Libby finished her Masters in Social Work degree at UNH and we all went to the hooding ceremony.  She had one Big Fan.


Glitter literally everywhere
 Libby and a classmate confused about what to do with no papers due the next week.
Libby's so Hood. Time to go help people.
 Sunday, we got up and headed to make it labs to turn one pile of wood into another pile of wood.  We started making all the wall sections.
Transferring the layout for all the studs bellow and above the windows.   

Libby cutting up a lot of lumber.  She cut out all the parts based on the cad model.

Chopping wood and making parts for our walls.  
 Libby is learning to use Spaceclaim (CAD) during the process.  I showed her how to measure parts for length and navigate in 3d.
Libby figuring out what to cut next.
We sorted all of the components on the floor.  This allowed us to make all the parts we needed to size and just assemble very easily.  Having a flexible work space like MakeIt Labs allows us to have a dry flat clean space and much easier to work with.


Parts in rows.  
The window wall sections would be over 220 pounds and 7 foot by 7 to 9 feet assembled.  Libby and I decided we can make it as a few smaller parts that will be easier to transport and easier handle for setup.


The look of a window wall section as it will assemble.


The exploded view of a window section broken down into a few parts.

All stacked up and ready to bring up to camp.  4 more and I will be ready to go.

All of the wall sections done and ready to go up to camp.  I just need to pick up 5 2x4's and tat should do it.
We might be this done next weekend. We might not.
 In theory this will all screw together very easily.  We will find out next weekend.  With any luck we will have all the walls and header up.


2012-04-29

38+52=90

Libby and I spent the day doing errands and doing a bit of work on the cabin.  As usual, I wanted to do a bunch of stuff and only a few things got done.

First I wanted to put up a rendering up of the entire cabin.  Here are a few views, no windows are filled in at this time.
Cabin with some wall sheathing and roof sheathing.  The large openings will all be windows.  
A view of the cabin at the door entrance.  The big openings are windows.  
The other night we cut and pre drilled all of the 6x6 piers for the cabin at Make it Labs.
All the posts cut and drilled.
Each beam had a notch put in it to marry itself with the beam.  We also pre drilled holes  for the lag bolts.  
Any step we can do in Nashua and not up at camp is one less thing that requires use of a battery.  The length of these beams will be adjusted at camp by chainsaw when we have an actual dimension.

For bringing junk to camp we got a trailer from Earl on craigslist.  It may need some work.

Slightly used trailer.  Some assembly required.  
We picked up some safety chains, red paint and rings for tie downs.  It needs new tires and a deck still.  Anyone know how to register a junky trailer in NH?  I imagine this trailer will make a few trips up to camp.  when done with that use, it will become a Tear Drop Trailer.  

2012-04-28

Cutting beams and complementary angles.

We were going to go up this weekend and do some site prep and delivery of material.  I called an audible on Friday and we stayed home to do some more construction work and Libby is finishing some school work before she closes out her last semester for grad school.

Thursday at work I saw a post on craigslist for shingles at 10 dollars a bundle.  I called up Earl and swung by on my way home.  A quick pit stop turned into a 3 hour lesson on how to roof a house and how to deal with the unique features of the roof.  He did not believe 4 square would fit in the Subaru.  As usual, the Subaru was up to the task.  He had a trailer under a pile of junk he negotiated down the price of.  I offered him 50, he countered with 40.  By the time he was done negotiating, he got me down from 190 to 140 for 400 sq ft of roofing.  We got 5 different colors so Libby is going to make a pattern in the roof.  I am thinking of going back to try and get some mismatched shingles to go up on the lean to.  We picked up some 6x6 Pressure treated timbers and brought them to Make it labs.  At dinner we had a critical desisgn review.

The Composite beam that went across the ceiling obstructed the view.  This is the older version of the cabin.
I did not have any 4x6 beams that were 16 so I came up with a way to use the 13 foot beams and plywood in a way similar to the Lean To we constructed last year.  I thought it was a good solution that allowed us to not have to buy a long beam.  It also makes transport simple.  That is something we always have to keep in the back of our minds when making components.  We were doing some searching for the wall lamps and found an awesome version that allows a chandelier.  In order to do this, we would have to do some re design of the interior 16 foot beam.
The composite Beam assembled.  Two 13 foot  2x6's I got from a pallet and some slivers of 1/2 inch plywood.  This gives us a 4x6 form factor.
I spent a few hours in Spaceclaim coming up with a new beam that gives us a better sight line and puts the chandelier above my head.

A composite beam to be constructed up north.  It won't be as strong as a straight beam, but will make the interior look better.  
I went to construct it today and had some issues with cutting angles without a protractor.  I couldn't verify anything so I gave up for the night.  I spent some time measuring angles and was able to find where my confusion was.  I measured 52 degrees for the angle for all of the joints that are not the peak beam in the computer model.  When I cut with the chop saw, it only went up to 45 degrees so I figured I would do all the 38 degrees first.  Once I did it, nothing looked right.  I realized after I went inside and cleaned up, I was cutting the angle backwards.  I then took a few minutes to make a construction layout of parts for the beam.

I decided I would make a manufacturing sheet for the 2x6 beams.  When I go to construct them it will allow me to cut up all of the components easily.
I had a strip of plywood left from the previous beam design which I used to make the joints stronger.  
So now I have some work for tomorrow.  I also need to grab a protractor so I can actually measure things.  We will do an assembly with a few screws just to test it.  When we start construction on the larger beams, I will do the same manufacturing information.  Looking at the over all roof construction it should be plenty strong.

The headers are all 4x6.  The laminated beams together make up the rest of it.  The main beams in the roof on the peaks and suports are laminated from 4x4's to give the peaks a 4x8 (3.5x7) effective beam size 
The rafters and other roof  structure together.   
all of the headers cut up and ready to go up north.  The only one left is the funky angled beam that I could not figure out tonight.  
Lots of stuff.doors and windows.
All of the walls will get a 5x7 windows I found cheap on craigslist.  Double pane 3 section sliders with screens.  They were 30 dollars each which ends up costing less than sheathing with plywood and whatever siding we will eventually use.  When we picked these up on Friday, I was checking out the pallets at the sheet metal shop.  They are 10 foot long and have big long beams they range from 1.5x3 inches to 4 by 4 inches.  With the amount of material they go through I should be able to salvage studs from pallets in a few weeks.
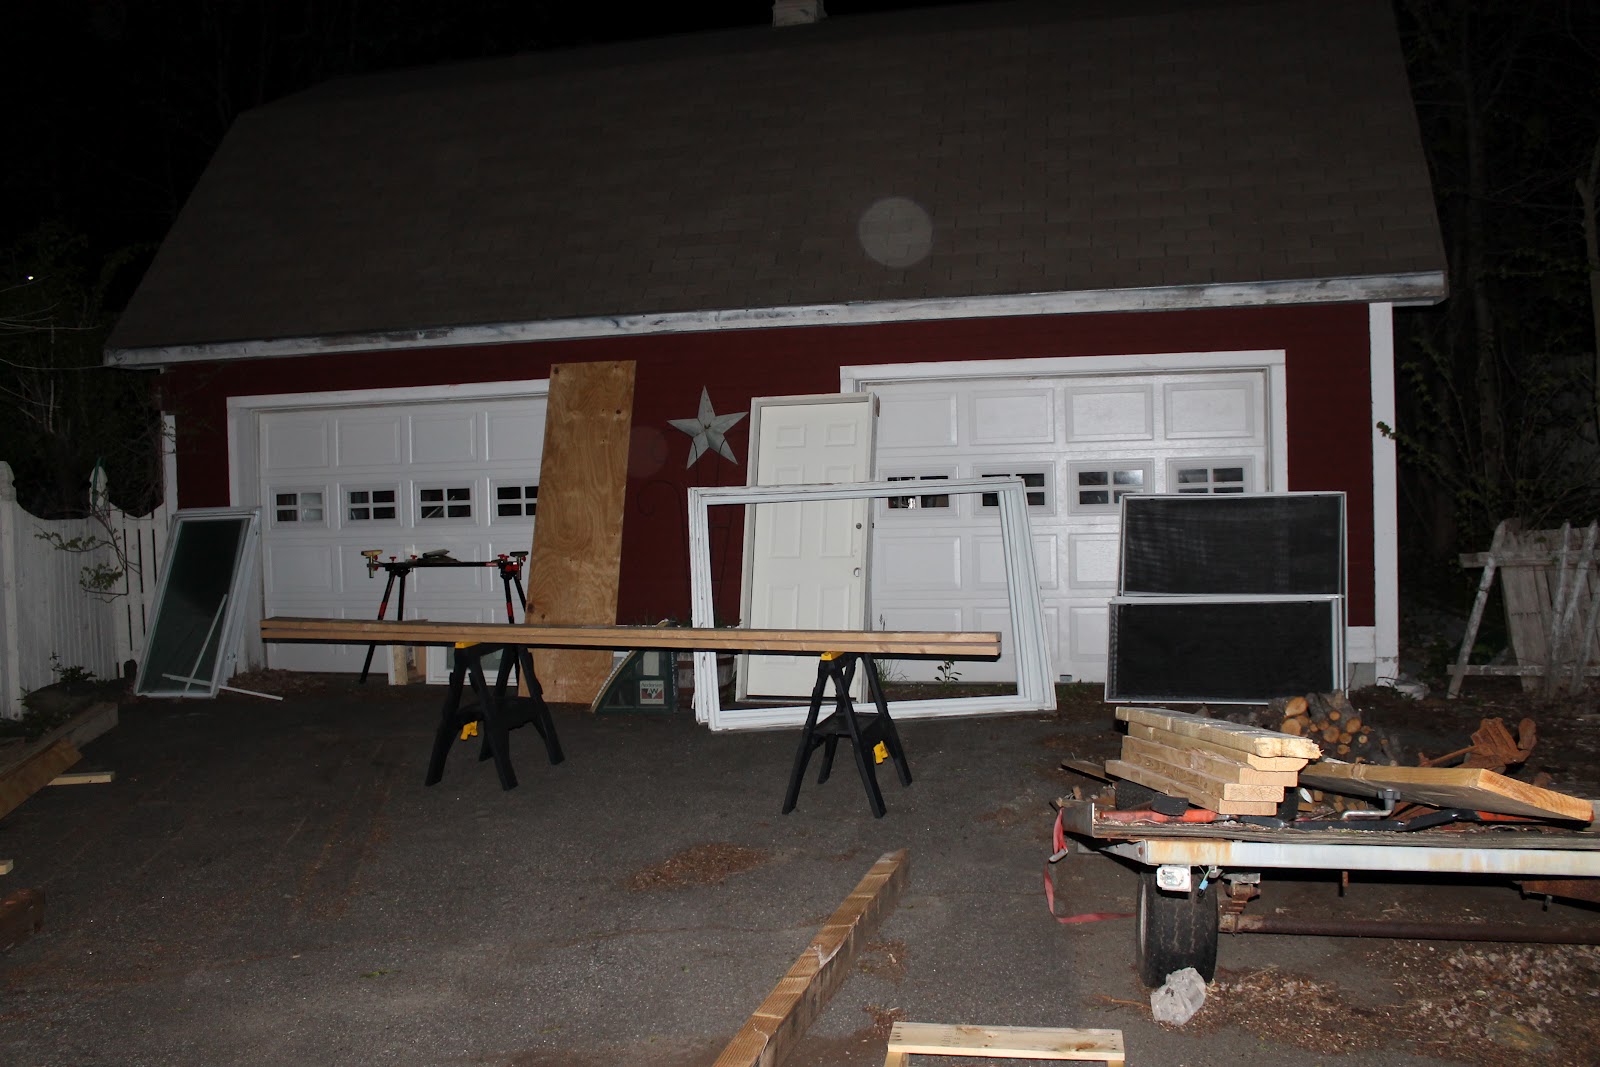
The cabin beams layed out in the driveway.  all set up, tomorrow Libby and I will test fit flooring.  With any luck, we will have enough material to cover all of the floor.
I have Been e-mailing back and forth with Jim about what works and what doesn't at camp.  With some input, we have decided to add 2 inches of foam insulation.  I found a bunch of sheets cheap on craigslist so this will go in during construction.  I will have it on top of a .5 inch sub floor.  this construction should make for a very strong floor unit and also keep some elements out.

The base is 1/2 inch sheathing.  Then 2 inches of Foam and the top layer is 2x8 and 2x10  recovered lumber.  
It is nice to be able to move things around digitally before cutting anything or committing to it.  I am pretty close to being done with the design, Libby is still adding ideas and features which may require some more design, but most of the over all design is done.  If anyone has any recommendations, Please let me know in the comments.  

2012-04-25

Animated Gifs

Back in the hay day of angelfire, and earthlink websites, animated gifts and bad page layout ruled the internet.  Until today, I could not figure out a worthwhile use of them aside from kittens doing cute things.  Today I made my first animated Gif.  It shows the steps for construction to get the floor built.  

Animation of the floor assembly.
I didn't get much progress done on actual construction tonight.  I did some work on preparation for phase 1 of construction.   I put my new chop saw platform together so to some saw chopping of stuff.  using the saw on the ground is not great.  having it off the ground with work supports makes it a much easier tool to use.
A 50 dollar chop saw on a 90 dollar stand. 

I went through all of the fasteners to see what I could reuse from the pallets.  I was able to get 36 3.5 by 3/8th lag bolts that are needed for all of the piers.  I still have 30 left over to make something else.
Lag Bolts from the used pallets.  Yay fender washers.  
I then went out to check out what we had left for flooring.  The main support I plan to use 2x10's and 2x12's with some sheathing over the top to make it pretty.
Stacks and stacks of wood.  With any luck, this will cover the entire floor.


Once the floor goes down, all force is going down and should be a very strong  box structure.  
The large 2x boards are only 102 inches long.  instead of buying longer boards, I came up with a plan that allows joints that are fully supported.    


2012-04-24

Decisions? Decisions!

So we are going to make a cabin.  We have a limited amount of free material and how will we best utilize it.  This boils down to limiting factors. It is the equivalent of a constant in math. In this case, it is what is the most valuable beams? The largest beams are Douglas Fur 4x6. The actual dimensions are 3.5" by 5.5" The long beams have a few large numbers 6 at 156" inches and three at 152". I chose 156" to be the long dimension. I was going to use the 152" as the short dimension. Then I started fleshing out the model It basically came down to my want to not cut plywood. Many of the decisions we made were very Chicken and the egg. I had to use two or more bits of information to make a decision. Everything we make will need to be hand carried to the site and transported up on the back of a truck. We will have battery powered tools and chainsaws up at camp so any prep work we can do at in Nashua will speed up work on site.


This is the pile of pallets we currently have.
The roof on the broad side. is 16 foot, or two plywood units. Up at camp we have some different building codes. Snow load is always less force than falling trees. We use a 12 inch rafter spacing to try and keep things from getting crushed. When we get to the point of manufacturing rafters, the additional work to make more is negligible due to our use of jigs. You can see a 12 inch overhang on each side that makes the major width of the cabin 14 feet.


The front view of the cabin shows what the over all dimensions will be.
We needed to make a longer beam for the wide dimension.  With a needed length of 168 inches (14 feet) we made a composite for the beam that joined over a pylon.  This will allow all force to go straight down.  We cut up sections so we could make the beam without buying any new material.
The floor detail shows the long beams split up.  
Now to construct a floor support structure with the materials at hand. We will have to cut a few beams but not to much waste.


Green Beams go in the X direction, Purple go in the Y.  I applied a color code and xy coordinate system so Manufacturing will be simplified.

 All the joists are cut up and ready to go.  This will be part of the first load up.  

All of the floor beams ready to go.  They still need  to be counter bored.
Putting things on the ground = rot.  We are going to have a minimum height of 1 foot up hill.  Libby also wants 6X6 Pressure treated for the so we have a super sturdy foundation to build upon.  The orange are 2x4 PT that will help solidify the base.   That will then sit on a cement block (16x8x4).  We can pre cut and drill all of the pylons at Make it Labs.  All force will be directly transferred to the piers because of the notch.  For Phase 1 of construction we won't be able to know the length of all of the pylons  so only a few permanent pylons  will be installed. 
The purple beams will all be counter bored so the screw heads won't interference with the floor boards.  this will also make locating the screws much simpler in the field.   
All of the purple beams will need to be drilled to allow for the screw heads to not displace the floor boards.  I will use Timberlok screws to keep these down.  
the detail showing the cross section of how this joint will work with the piers.  
The blue pylons will be fastened with reclaimed lag bolts.  the three longer beams will be trimmed by a portable saw, or if I get annoyed with it's battery I will use the chainsaw.
Phase 1 construction goal.
We will find an ideal site and start to lay it out. Pink cement bricks get laid out and the back support is constructed. In the next rendering, the stage I hope to get to by the end of the weekend of phase one. We can then take measurements and fill in the rest of the piers on the following trip for Phase 2 of construction. The purple joists will be installed later so it is easy access to put the rest of the pylons in.

I hope this answers why I made the decisions I did for the frame.